If your garage door suddenly refuses to close or reverses for no clear reason, misaligned safety sensors are often the culprit. Learning How To Align Garage Door Sensors can save you time, prevent unnecessary service calls, and restore safe operation quickly. Modern garage door opener systems rely on safety reversing sensors and an invisible infrared beam to detect obstructions and protect people, pets, and property.
When garage door sensors not aligned properly, the opener interprets the situation as a safety risk. This leads to common symptoms like blinking lights, incomplete closing cycles, or a garage door won’t close sensor issue. The good news is that most homeowners in Lewisville, TX can handle garage door sensor alignment with basic tools and careful attention.
This expert DIY guide walks you through garage door sensor troubleshooting, explains why alignment matters, and shows the exact steps to adjust garage door sensors safely and correctly.
Why Proper Garage Door Sensor Alignment Matters
Your garage door’s photo eye sensors are a critical part of the overall garage door safety system. Mounted near the garage door track area, these devices communicate through an invisible sensor signal. When something interrupts the beam, the opener triggers the automatic reverse feature to prevent accidents.
Poor garage door safety sensor alignment can lead to unreliable door operation, repeated opener errors, compromised door safety compliance, and unnecessary wear on the garage door opener system. Many homeowners searching for garage door opener problems or why garage door won’t close discover that the issue is simply a minor alignment shift. Addressing it promptly improves garage door closing safety and extends system life.
Common Signs Your Garage Door Sensors Are Misaligned
Before starting DIY garage door sensor repair, confirm the problem. Misalignment produces very specific warning signs tied to the alignment indicator lights on the sensors.
- One or both sensor LED lights are blinking, or the garage door closes then opens again immediately.
These symptoms typically point to a garage door photo eye not aligned condition rather than a major mechanical failure. Recognizing this early helps you apply the correct garage door sensor out of alignment fix.
Tools You’ll Need Before You Begin
Successful garage door safety beam adjustment does not require specialized equipment, but preparation matters. Most adjustments involve loosening the mounting wing nut, repositioning the sensor brackets, and verifying proper beam alignment. Homeowners usually complete the task using common household tools such as a clean microfiber cloth, a level, and a screwdriver or wrench. Having these items ready ensures your garage door sensor maintenance process goes smoothly and safely.
How To Align Garage Door Sensors: Step-by-Step Process
Follow these seven proven garage door sensor alignment steps carefully. Take your time — precision matters more than speed.
Step 1: Turn Off Power to the Opener
Safety always comes first. Disconnect the garage door opener system from power to avoid accidental activation during the garage door repair process. This protects both you and the low voltage wiring connected to the sensors.
Step 2: Locate the Photo Eye Sensors
Find the photo eye sensors mounted on both sides of the door near the floor. They should face each other directly across the opening. Carefully inspect the surrounding garage door track area for dirt, spider webs, or physical obstructions that may interfere with proper obstruction detection.
Step 3: Clean the Sensor Lenses
Dirty lenses often mimic a garage door sensor not working situation. Use a soft cloth to gently wipe each sensor. Even minor dust can weaken the infrared beam and disrupt the sensor signal. This simple step resolves many cases of garage door safety sensors not working without further adjustment.
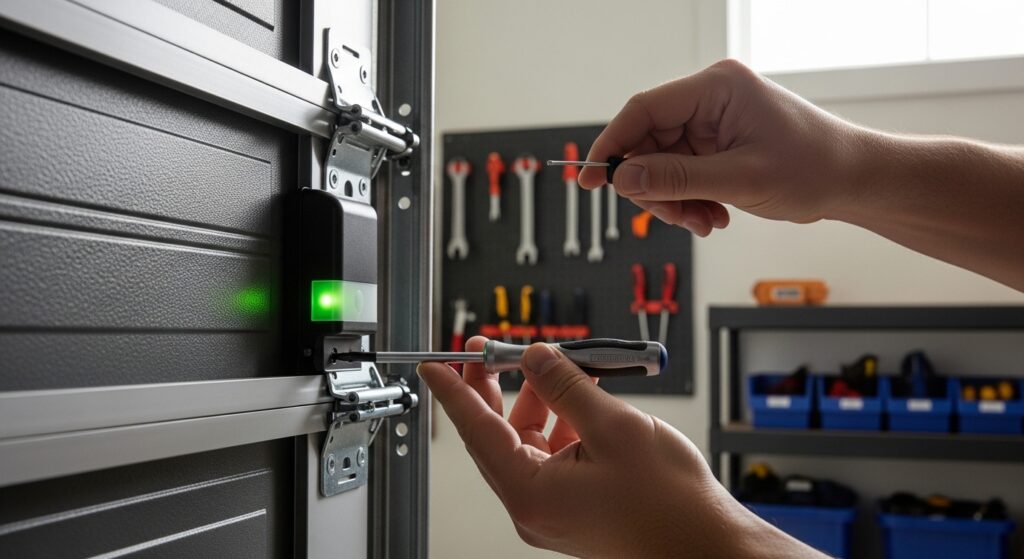
Step 4: Loosen the Sensor Brackets
Carefully loosen the mounting wing nut holding each sensor in place without removing it completely. The goal is to allow slight movement for accurate sensor positioning while keeping the unit secure. This is the most delicate part of how to realign garage door sensors, so move slowly and deliberately.
Step 5: Adjust for Perfect Beam Alignment
Now gently align garage door sensors so they face each other directly. Watch the alignment indicator lights closely. Proper garage door photo eye alignment typically results in steady, non-blinking lights. If you notice a garage door sensor blinking red or a garage door sensor flashing light, continue making small adjustments until both lights stabilize. This step effectively helps fix misaligned garage door sensors.
Step 6: Tighten and Secure the Sensors
Once alignment is correct, firmly retighten the sensor brackets. Avoid over-tightening, which can shift the sensor calibration you just completed. Stable mounting ensures long-term automatic door safety and reduces future garage door opener troubleshooting needs.
Step 7: Restore Power and Perform a Safety Test
Reconnect power and run a full garage door safety check. Close the door and wave an object through the beam to verify the door reversal safety feature works properly.
- The door should immediately reverse when the beam is interrupted.
If the door operates smoothly and passes this test, your garage door infrared sensor fix was successful.
Quick Troubleshooting Guide
The table below helps homeowners quickly diagnose common garage door opener sensor problem scenarios.
| Symptom | Likely Cause | Recommended Fix |
| Blinking red sensor | Sensors misaligned | Perform garage door sensor alignment |
| Door reverses before closing | Beam obstruction | Clean lenses and check alignment |
| No sensor lights | Wiring issue | Inspect sensor wiring and connections |
| Door won’t close at all | Safety beam blocked | Clear path and adjust sensors |
| Intermittent closing | Loose brackets | Tighten mounting wing nut |
When DIY Alignment Isn’t Enough
While many garage door sensor troubleshooting guide steps are homeowner-friendly, some problems require professional help. If you notice damaged sensor wiring, persistent garage door opener flashing light errors, or repeated failures after adjustment, it may indicate deeper electrical or opener issues.
Homeowners in Lewisville, TX often schedule garage door inspection or residential garage door repair when the garage door opener repair keeps failing, sensors repeatedly lose calibration, the opener motor behaves inconsistently, or the system fails a full garage door maintenance tips checklist. In these cases, experienced technicians can perform advanced diagnostics and ensure full door safety compliance.
Preventive Maintenance Tips for Long-Term Performance
Regular garage door sensor maintenance dramatically reduces emergency calls and extends the life of your garage door opener safety sensors. Make sensor checks part of your seasonal garage door maintenance tips routine. Keep the garage door track area clean, verify stable sensor positioning, and inspect low voltage wiring annually. Preventive care minimizes the risk of future garage door opener problems and supports reliable daily operation.
For homeowners searching garage door service Lewisville TX or garage door repair near me, routine maintenance is often the difference between a quick adjustment and a costly repair.
Final Thoughts
Mastering How To Align Garage Door Sensors is one of the most valuable DIY skills a homeowner can learn. Because these small devices control the entire automatic reverse feature, even minor misalignment can cause major frustration. Fortunately, with careful cleaning, precise beam alignment, and secure mounting, most sensor issues can be resolved in under an hour.
Consistent garage door safety system maintenance not only restores smooth performance but also protects your family and property. If your garage door sensor not working problem persists despite proper alignment, don’t ignore the warning signs. A professional garage door repair process may be necessary to address deeper electrical or mechanical faults. Staying proactive ensures your garage door remains safe, reliable, and fully compliant year-round.
FAQs
How do you know if garage door sensors are misaligned?
The clearest sign is blinking or uneven sensor LED lights. You may also notice the garage door closes then opens again or refuses to close at all. These symptoms typically indicate a garage door safety sensor alignment issue rather than a major opener failure.
Why is my garage door sensor blinking red?
A garage door sensor blinking red usually means the receiving sensor is not detecting the infrared beam properly. This can be caused by dirty lenses, loose sensor brackets, or incorrect beam alignment. Cleaning and realigning typically resolves the issue.
Can I fix misaligned garage door sensors myself?
Yes. Most homeowners can adjust garage door sensors using basic tools. Following proper garage door sensor alignment steps and verifying the alignment indicator lights are steady usually restores normal operation.
How long does it take to align garage door sensors?
In most cases, DIY garage door sensor repair takes 15–30 minutes. However, if you encounter wiring damage or persistent garage door opener troubleshooting issues, professional service may be required.
Why won’t my garage door close even though nothing is blocking it?
If nothing is physically obstructing the door, the most common cause is a garage door photo eye not aligned condition. The opener believes something is in the way because the sensor signal is interrupted. Proper alignment and cleaning usually fix the problem.
