
A garage door opener making noise is rarely just a nuisance; it is a mechanical distress signal indicating friction, misalignment, or component fatigue. Ignoring excessive garage door vibration leads to premature motor failure and costly structural damage to the door panels. A professional noisy garage door repair requires a systematic diagnostic approach to isolate whether the sound originates from the motor, the drive assembly, or the track hardware. By addressing these auditory warnings early, homeowners can ensure long-term operational safety and prevent a total system breakdown.
Effective garage door maintenance hinges on understanding the specific physical forces at play within your overhead system. High-decibel grinding or squeaking often points to a lack of garage door lubrication on critical pivot points and bearing plates. Utilizing a garage door manual release test allows you to manually assess the door’s weight and balance without the opener’s interference. This guide provides a technical roadmap for identifying the source of the racket and implementing professional-grade solutions. Reference your garage door opener owner’s manual for specific torque settings before proceeding with any hardware adjustments.
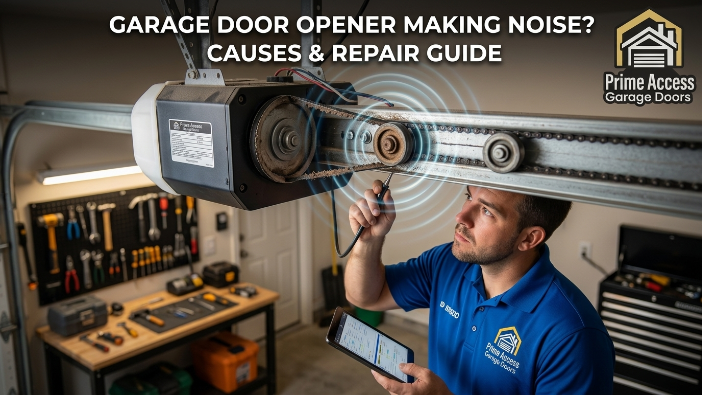
Why Is My Garage Door Making Noise?
The root cause of a loud system is usually found in the friction between moving steel parts or a lack of tension in the drive mechanism. If you hear a rhythmic slapping sound, your system likely requires a chain drive tension adjustment to prevent the metal links from hitting the rail.
Grinding noises frequently stem from a lack of garage door internal gear lubrication, where the plastic drive gears begin to wear off due to heat and pressure. Worn-out garage door rollers and hinges contribute to a “popping” sound as the rollers struggle to glide smoothly within the vertical and horizontal tracks. Furthermore, an unbalanced door puts immense strain on the motor, which is easily identified by performing a garage door balance test.
How to Fix a Noisy Garage Door
A professional-grade noisy garage door repair requires a methodical approach that moves beyond superficial fixes to address the mechanical physics of the system. You must begin by isolating the sound: a grinding noise usually indicates metal-on-metal friction, while a vibrating hum suggests the opener is struggling against an unbalanced load. Start by performing a garage door balance test to ensure the springs are doing the heavy lifting; if the door doesn’t stay halfway open when manually operated, your opener is overworking and creating excess noise.
Once the balance is confirmed, proceed to tighten every bolt on the tracks and hinges, as even a slightly loose nut can create significant garage door vibration during a cycle. Finally, examine the garage door internal gear lubrication within the motor housing, as dry gears are the primary cause of high-pitched whining and eventual motor failure.
Best Practices for Mechanical Silence
Systematic garage door lubrication is the most effective way to eliminate screeching and ensure smooth operation. Apply a high-quality lithium or silicone-based spray to the garage door rollers and hinges, focusing on the ball bearings rather than the track surface.
Ensure you avoid using thick grease on the tracks, as this traps debris and eventually increases friction and noise. This simple maintenance step reduces the workload on the opener and significantly dampens operational sounds.
Drive-Specific Adjustments
For those with chain-driven systems, performing a chain drive tension adjustment is critical to stop the “clanking” against the metal rail. If your unit is a screw-drive model, you must prioritize screw drive lubrication using the manufacturer-recommended lubricant to prevent metal-on-metal grinding.
Conversely, belt drive maintenance usually involves a simple visual inspection for fraying and ensuring the tension is tight enough to prevent slipping. Each drive type has specific tolerances that must be respected to maintain a quiet garage environment.
Best Practices & Quiet Garage Door Solutions
Upgrading your hardware is often more effective than repeated repairs on an aging, low-quality system. Installing a Vibration Reduction Kit can decouple the opener from the home’s structure, preventing the “humming” sound from vibrating through the ceiling.
A high-quality Vibration Isolator acts as a shock absorber between the motor housing and the perforated angle iron straps. These technical upgrades are essential for homeowners with living spaces located directly above or adjacent to the garage.
Advanced Sound Dampening
Replacing standard steel rollers with nylon-coated alternatives will provide an immediate and drastic reduction in track noise. Inspect the header and door brackets installation to ensure no bolts have vibrated loose over the years of heavy cycles.
Secure brackets prevent the “shaking” that occurs when the opener arm struggles to initiate the door’s upward movement. These structural reinforcements ensure the motor’s energy is spent moving the door rather than shaking the hardware.
Testing and Calibration
Conducting a garage door manual release test twice a year ensures that the door remains easy to operate by hand. If the door feels heavy, the springs are under-tensioned, which forces the opener to work twice as hard and make twice the noise.
Check your garage door opener owner’s manual for instructions on adjusting the limit switches and force settings. Properly calibrated force settings prevent the motor from “over-pushing” at the end of a cycle, which stops the slamming sound.
How to Fix a Noisy Garage Door on a Budget
You do not need an expensive contractor to handle basic garage door maintenance tasks that silence a loud system. Tightening every nut and bolt on the track and hinges with a basic socket wrench can eliminate most of the rattling.
Focus your efforts on garage door lubrication, as a single can of professional-grade lubricant costs less than twenty dollars but prevents hundreds in repairs. Regularly cleaning the tracks with a damp cloth prevents the buildup of hardened grease that causes the rollers to skip and “thump.”
DIY Diagnostic Steps
A garage door balance test is a free diagnostic tool that tells you exactly where your maintenance budget should be spent. If the door stays halfway open on its own, your springs are fine, and you can focus your funds on a Vibration Isolator.
If the door falls, your budget must be prioritized for a professional spring adjustment rather than cosmetic noise fixes. Safety must always come before sound reduction when dealing with high-tension components.
Inexpensive Hardware Tweaks
Adding rubber washers to the mounting bolts of the opener can act as a DIY Vibration Reduction Kit for minimal cost. Ensure the header and door brackets installation is flush against the wall to stop the “knocking” sound during the start of a cycle.
Inspect the garage door internal gear lubrication by removing the motor cover and applying grease to the white plastic gears. These small, low-cost interventions collectively result in a significantly quieter and more reliable garage door system.
The garage door makes a loud noise when opening and closing
A persistent roar or screech during operation usually signifies a systemic failure in your garage door maintenance routine. High-decibel screeching is almost always the result of metal-on-metal friction caused by a total lack of garage door lubrication on the pivot points. When the garage door rollers and hinges become bone-dry, they bind rather than roll, forcing the motor to drag the weight across the tracks.
This unnecessary resistance causes the motor to run hotter and louder, eventually leading to internal component fatigue. You must address these friction points immediately to prevent a full mechanical seizure of the drive system.
- Lubricate Rollers: Apply a silicone-based spray directly to the ball bearings of each roller to ensure smooth rotation. Avoid using WD-40, as it is a degreaser and will actually strip away the necessary protection.
- Check Track Alignment: Ensure the vertical and horizontal tracks are perfectly plumb and level to prevent the door from rubbing against the stops. Misaligned tracks create a scraping sound that resonates through the entire garage structure.
- Tighten Hardware: Use a socket wrench to secure every nut and bolt on the hinges and track brackets. Vibration naturally loosens these fasteners over time, creating a rattling symphony during every cycle.
- Inspect the Belt or Chain: Look for signs of fraying on belts or rusted links on chains that might be catching on the drive sprocket. A damaged drive medium creates a rhythmic ticking or slapping sound that increases with speed.
- Clean the Tracks: Wipe the inside of the tracks with a clean rag to remove hardened grease and road debris. Debris buildup causes the rollers to “jump,” which generates a low-frequency thumping noise.
- Test Door Balance: Perform a garage door balance test to verify that the springs are providing the correct amount of lift. An unbalanced door is the primary cause of motor strain and excessive operational noise.
The garage door makes a clunking noise when opening
A “clunking” noise isn’t just an annoyance; it’s a mechanical warning that your system is fighting against itself. This sound typically originates from mechanical interference or a timing mismatch between the motor’s pull and the door’s weight. When the opener struggles to overcome a sticking point in the tracks or a flat spot on a roller, the sudden release of tension creates a jarring “clunk” that vibrates through the entire chassis.
If ignored, this repetitive impact will inevitably strip the internal nylon drive gears or snap a mounting bracket. To fix this, you must look beyond the noise and identify the specific point of friction where the fluid motion of the door is being interrupted.
The following table provides a technical breakdown of why a garage door “clunks,” how to diagnose the specific component, and the estimated repair urgency.
| Symptom Location | Primary Cause | Technical Diagnostic | Repair Requirement | Severity Level |
| Top of Door/Opener | Stripped Drive Gear | Plastic shavings found inside the motor cover. | Gear & Sprocket Kit Replacement | High (System Failure Imminent) |
| Horizontal Tracks | Worn/Flat-Spotted Rollers | Roller “slides” instead of spinning in the track. | High-Cycle Nylon Roller Upgrade | Medium (Track Damage Risk) |
| Torsion Shaft | Bearing Plate Failure | Metal-on-metal grinding or shaft wobbling. | Center/End Bearing Replacement | High (Safety Risk) |
| Door Panels | Loose Hinge Bolts | Hinge “pops” as the panel rounds the radius. | Torque-Check & Bolt Tightening | Low (Maintenance Issue) |
| Spring System | Coil Bind / Dry Springs | Individual spring coils catching on each other. | Silicone-Based Lubricant Application | Low (Friction Issue) |
| Track Alignment | Track Misalignment | Door hits the track “stop” or vertical/horizontal gap. | Track Re-spacing & Leveling | Medium (Derailment Risk) |
| Chain/Belt Rail | Excessive Slack | Drive chain “slaps” the top of the rail. | Tension Bolt Adjustment | Medium (Chain Stretch) |
| Motor Chassis | Loose Motor Mounts | Motor head shifts 1-2 inches during startup. | Vibration Isolator/Bolt Tightening |
The garage door is making noise but not opening
When the motor hums or grinds but the door remains stationary, the physical connection between the power unit and the door has been compromised. This scenario often requires a garage door manual release test to determine if the door is stuck in the tracks or if the opener itself is broken. If the motor makes a high-pitched “whirring” sound, the garage door internal gear lubrication has likely failed, leading to stripped plastic gears that can no longer turn the drive sprocket.
In other cases, the carriage may simply be disconnected from the drive motor, or the “cold weather” effect has caused the grease to solidify. You must diagnose whether the issue is a broken trolley or a seized motor before attempting to force the door open.
Stripped Internal Drive Gears
If you hear the motor spinning but the chain or belt isn’t moving, the internal drive gear has likely reached the end of its lifespan. These gears are often made of reinforced plastic to protect the motor, and they will wear down if the door is too heavy or unbalanced.
Open the motor housing to check for “plastic snow,” which is a definitive sign that the gear kit needs a total replacement. Proper garage door internal gear lubrication during your yearly maintenance can prevent this specific type of mechanical failure.
Engaging the Manual Release
The red emergency cord is your primary tool for diagnosing a motor that makes noise but fails to move the door. Pulling this cord allows you to manually lift the door to check for obstructions or broken springs that the motor cannot overcome.
If the door is impossible to lift by hand, the noise you hear is the opener struggling against a “dead” weight that it was never designed to carry. Never attempt to “assist” the motor while it is making noise, as this can lead to catastrophic gear stripping.
Trolley and Carriage Misalignment
The trolley is the piece that travels along the rail, and if it becomes stuck or disconnected, the motor will move without bringing the door along. Inspect the rail for any “teeth” that may have sheared off if you are using a screw-drive system, which requires specific screw drive lubrication.
If the carriage is engaged but sliding, the inner slide may be worn out, requiring a hardware replacement to restore the connection. Check your garage door opener owner’s manual to identify the specific part numbers for your drive’s carriage assembly.
Step-by-Step Solutions to Fix Noisy Garage Doors
Solving a noisy system requires a logical progression from basic maintenance to technical component adjustment. You must start by securing the structural integrity of the unit, as loose hardware is the most common source of high-frequency rattling and vibration. A professional-grade noisy garage door repair involves inspecting every bolt on the track hangers, and hinges, ensuring the system remains rigid during the high-torque start of a cycle.
Once the hardware is tight, the focus shifts to the drive mechanism and the balance of the door itself. Failing to follow a structured repair sequence often leads to “ghost noises” where one fix is overshadowed by another underlying mechanical failure.
Perform a Manual Balance Test
The first step in any technical diagnostic is a garage door balance test to ensure the springs are correctly tensioned. Disconnect the opener and lift the door halfway; if it slides down or snaps up, the motor is under extreme duress, which creates a loud straining hum.
Correcting the balance is a prerequisite for a quiet system because no amount of grease can silence a motor that is lifting dead weight. Always refer to your garage door opener owner’s manual for specific safety instructions before touching the high-tension springs.
Apply Precision Lubrication
Standard garage door lubrication is often performed incorrectly, leading to more noise over time. You must use a dedicated silicone or lithium spray on the garage door rollers and hinges, focusing specifically on the internal ball bearings and pivot points.
Do not apply thick grease to the tracks, as this traps dust and creates a “thumping” sound as the rollers struggle to push through debris. Proper lubrication creates a thin, protective barrier that eliminates the metal-on-metal screeching common in neglected systems.
Calibrate Drive Mechanism Tension
If you own a chain-driven model, a chain drive tension adjustment is essential to stop the metal links from slapping against the rail. For those with screw-drive openers, the focus should be on screw-drive lubrication to ensure the trolley glides smoothly without “chattering” along the threaded rod.
In contrast, belt drive maintenance usually requires a simple tension check to ensure the belt isn’t slipping, which can cause a high-pitched squeal. Aligning the drive tension with manufacturer specs reduces the mechanical drag that resonates through the motor housing.
Inspect and Replace Worn Rollers
The condition of your garage door rollers and hinges determines how much vibration is transferred into the garage tracks. If your rollers are made of unsealed steel, they will eventually rust and seize, leading to a grinding noise that sounds like gravel in a blender.
Upgrading to sealed nylon rollers is a high-authority solution that provides a near-silent operation by absorbing the impact of track imperfections. This simple hardware swap is often the most dramatic “silent” upgrade a homeowner can perform without replacing the entire opener.
How to Reduce Garage Door Noise
To achieve a whisper-quiet operation, you must address the transfer of energy from the motor to the home’s structure. Installing a Vibration Reduction Kit is the most effective way to decouple the opener from the ceiling joists, preventing the “booming” sound that travels through the drywall.
Furthermore, ensure that the header and door brackets installation is perfectly aligned; any slight tilt in the mounting hardware forces the opener arm to work at an angle, which generates unnecessary friction and noise. By combining mechanical maintenance with structural sound-dampening, you can transform a disruptive garage door into a smooth, professional-grade entry system.
- Install a Vibration Isolator: Place these rubber mounts between the opener and its support straps to absorb motor harmonics. This prevents the motor’s natural hum from amplifying through the wooden frame of your house.
- Upgrade to Nylon Rollers: Replace standard metal rollers with high-quality nylon versions to eliminate track-clatter. Nylon provides a softer contact point that significantly reduces decibel levels during the opening and closing cycles.
- Check Internal Gear Lubrication: Apply a manufacturer-approved grease to the garage door internal gear lubrication points within the motor head. This prevents the high-pitched “whine” associated with dry, friction-heavy plastic drive gears.
- Perform a Manual Release Test: Periodically use the garage door manual release test to check for physical obstructions in the tracks. Identifying a “catch” in the track manually prevents the motor from forcing its way through and creating a loud bang.
- Tighten All Fasteners: Use a socket wrench to check the tension on every bolt and screw throughout the track system. Secure hardware prevents the “rattling” symphony that usually occurs when a door moves at high speeds.
Conclusion
Effective garage door maintenance is the most reliable strategy for transforming a disruptive, rattling system into a whisper-quiet entry point. By prioritizing regular garage door lubrication and performing a biannual garage door balance test, you can prevent the mechanical strain that leads to expensive motor failures. Ultimately, a proactive approach to hardware care ensures that your home remains peaceful while extending the operational lifespan of your entire overhead system.
Investing in high-quality solutions like a Vibration Reduction Kit or nylon rollers provides a long-term fix for persistent garage door vibration. While basic DIY tweaks can silence minor squeaks, addressing the structural alignment and garage door internal gear lubrication is essential for maintaining professional-grade performance. By following this technical roadmap and referencing your garage door opener owner’s manual, you can achieve a durable, high-authority repair that stands the test of time.
FAQS
Why is my garage door opener squealing?
A high-pitched squeal is almost always a sign of extreme friction caused by a total lack of garage door lubrication on the rollers, hinges, or drive rail. If the sound persists after oiling, it may indicate that the belt drive maintenance is overdue or that the motor’s internal bearings are starting to seize.
Why is my garage door opener humming?
A humming sound typically occurs when the motor is receiving power but cannot move the load, often because the garage door manual release test reveals a seized or unbalanced door. It can also point to a failed capacitor or stripped gears, where the garage door internal gear lubrication has failed and the motor is spinning without engaging the drive.
What’s the average life of a garage door opener?
Most residential garage door openers have a lifespan of 10 to 15 years, depending heavily on the frequency of garage door maintenance and the weight of the door. Regular upkeep, such as performing a garage door balance test, can extend this life by reducing the mechanical strain on the motor and drive assembly.
Why is my garage door opener making a clicking sound?
Clicking is often a diagnostic signal from the logic board, frequently caused by misaligned safety sensors or a light bulb socket malfunction. In mechanical terms, a clicking or “popping” sound can also stem from loose garage door rollers and hinges catching on the track joints during operation.
Will unplugging a garage door opener reset it?
Unplugging the unit for about 30 seconds acts as a hard “power cycle,” which can clear minor logic board glitches or sensor errors. However, this will not reset the travel limits or programmed remotes, as those settings are stored in non-volatile memory and must be adjusted according to your garage door opener owner’s manual.
