
The garage door opener motor is the high-torque core of your home’s largest moving system, yet it remains the most neglected component until a total mechanical failure occurs. A malfunctioning motor isn’t just an inconvenience; it is a critical security breach and a safety hazard that places immense strain on your door’s structural integrity. Most homeowners mistake a struggling motor for a simple “glitch” when, in reality, it is often a symptom of advanced drive-train wear and tear or a dangerous imbalance in the torsion system. To effectively fix the garage door motor, you must look beyond the plastic housing and address the synergy between electrical logic and mechanical force.
Effective troubleshooting the garage door opener requires moving past guesswork and adopting a diagnostic mindset used by authorized dealer service technicians. Whether your unit is suffering from a circuit breaker blown fuse or an internal gear failure, the solution must be systematic to avoid permanent damage to the logic board. A strong hook in any repair strategy is recognizing that a motor is only as good as the safety perimeter it operates within. By prioritizing a “diagnose-first” approach, you ensure that your Raynor Garage Doors system or any other professional-grade opener returns to peak performance without unnecessary replacement costs.
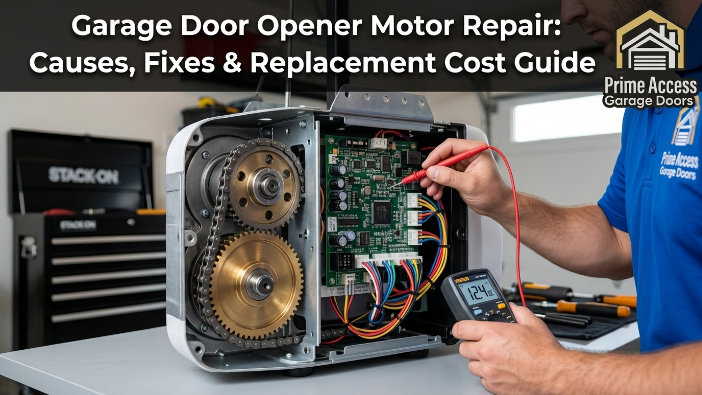
Understanding Garage Door Opener Motors
The motor inside your opener serves as the power source that drives the carriage along the rail, but it relies on a complex ecosystem of safety and electrical components. Most modern units utilize either a permanent magnet DC motor for quiet operation or a rugged AC motor for heavy-duty lifting.
Troubleshooting the garage door opener often begins with checking the power supply; a circuit breaker or fuse can mimic a dead motor, leading to unnecessary repair costs. It is vital to recognize that the motor does not lift the door’s full weight—that is the job of the springs—so any motor struggle is often a symptom of mechanical resistance.
Diagnosing Motor Overheating
If your motor stops responding after successive cycles, motor overheating is the most likely culprit, as thermal sensors will temporarily disable the unit. Allow the unit to cool for at least 30 minutes before attempting to operate it again, as repeated force-starts can permanently damage the internal windings.
This safety feature is designed to protect your investment and signal that the door may be out of balance. Using the door manually during this cooling period can help you determine if the motor is fighting excessive weight.
Electronic Logic and Wall Stations
Sometimes the motor is perfectly healthy, but the wall station locking feature has been engaged, which prevents the motor from receiving signals. Check the “Lock” or “Vacation” button on your interior control panel to ensure you haven’t accidentally disabled the system’s remote functionality.
This simple check is a cornerstone of effective garage door motor repair and saves you from a wasted service call fee. Ensure all wired connections to the wall station are secure, as loose low-voltage wires often trigger intermittent motor failure.
How to Replace a Garage Door Opener Motor
Replacing a motor is a high-level task that requires you to disconnect the power and the emergency release cord to safely access the internal drive-train. You must first remove the outer housing to expose the motor assembly and the opener control panel, ensuring you document the wiring configuration for the new unit.
If the motor has suffered total electrical failure, swapping the assembly is often more cost-effective than attempting to rebuild a scorched logic board or winding. Once the new motor is seated, you will need to perform a complete remote control reprogramming to sync your existing transmitters with the new logic board.
Managing Tension and Hardware
Before the motor is fully secured, you must ensure the door is closed and the tension spring replacement is not creating excessive drag. A motor installed on an unbalanced door will fail within months due to the extreme torque required to overcome the weight.
Aligning the motor perfectly with the rail is crucial to prevent lateral stress on the drive shaft during the opening cycle. Verify that all mounting brackets are tightened to the ceiling joists to prevent vibration-induced motor damage.
Safety Sensor Integration
After the motor is mounted, you must reconnect the garage door safety sensors and verify that they are receiving a consistent power supply. These photo eyes are the system’s primary safety net, and the new motor will refuse to close the door if they are miswired.
Testing the reversal system immediately after installation is a non-negotiable step in the repair process to ensure homeowner safety. Ensure the lenses are clean and pointed directly at each other to maintain a solid communication link.
Drive-Train Reattachment
The final step involves re-engaging the trolley and ensuring the drive-train wear and tear is minimized by applying a lithium-based lubricant to the rail. If you are using a chain or belt drive, check the tension to ensure it isn’t sagging or overly tight, as both conditions stress the new motor.
A smooth, quiet transition during the first few test cycles indicates a successful mechanical and electrical integration. Always run a full cycle to confirm that the travel limits are set correctly for the new motor’s logic.
The Garage Door Opener Motor Works, but the Chain is Not Moving
When you hear the motor whirring or grinding but the chain remains stationary, the internal drive gear is likely stripped or the sprocket has sheared off. This is a common result of long-term drive-train wear and tear, where the plastic gears inside the motor housing eventually shave down to dust. To fix the garage door motor in this scenario, you must replace the gear and sprocket kit, which is far cheaper than replacing the entire power head.
Before starting the repair, check the emergency release cord to make sure the trolley hasn’t been disconnected, which would allow the motor to spin freely without moving the door. It is also wise to perform a garage door alignment check, as a binding door can put enough pressure on the gears to strip them instantly. Inspect the chain for any kinked links that could be causing the drive gear to jump or slip during operation.
Choosing the Right Garage Door Opener Motor
Selecting a replacement motor requires balancing horsepower against the specific weight and material of your door. A standard single-car door may only require a 1/2 HP motor, but heavy carriage-house or wood doors necessitate at least 3/4 HP or a high-torque DC motor. You should also consider the drive type; while chain drives are durable, belt drives are preferred for attached garages where noise reduction is a priority.
Ensure your new motor is compatible with your existing garage door safety sensors and rail system to avoid a full-system teardown. Always verify that the new unit supports the latest infrared light signal technology for maximum safety and security.
High-Frequency Signal Security
Modern motors utilize rolling code technology, which prevents hackers from intercepting your remote control reprogramming sequence to gain entry. When choosing a motor, ensure it is compatible with MyQ or similar smart-home platforms for real-time monitoring and alerts.
This digital layer of security is just as important as the physical horsepower of the motor itself. Most high-end motors now come with encrypted signals that refresh after every single use of the remote.
Quality of Photo Eyes
Not all photo eyes are created equal, so look for a motor kit that includes high-grade, weather-resistant sensors. These units must be able to maintain a clear infrared light signal even in direct sunlight or heavy dust environments.
Reliable sensors prevent the “false reversal” issues that plague many cheap, off-brand motor replacements. Higher quality sensors often feature diagnostic LEDs that help you identify alignment issues at a glance.
Integrated Control Features
The best replacement motors come with a sophisticated opener control panel that provides diagnostic codes and battery backup status. These panels often include a built-in motion sensor to turn on the lights when you enter the garage, adding a layer of convenience.
Choosing a unit with an advanced wall station makes future troubleshooting the garage door opener significantly easier for the homeowner. Many modern panels also feature a maintenance alert system that notifies you when the motor has reached a specific cycle count.
Warranty and Professional Support
Finally, prioritize brands that offer an authorized dealer service network and long-term warranties on the motor and gears. A motor might look like a bargain online, but without local support or a lifetime warranty on the motor windings, it could become a liability.
Investing in a reputable name like Raynor Garage Doors ensures that parts and expert advice are always within reach. A strong warranty serves as a testament to the manufacturer’s confidence in the motor’s long-term performance under daily stress.
Warning Signs Your Garage Door Opener Motor Needs Repair
Identifying a failing motor early can prevent a total system collapse and save you from being locked out of your property. One of the most common red flags is a loud, rhythmic grinding noise emanating from the chassis, which suggests that the internal gears are losing their teeth. You may also notice the door moving at a significantly slower pace than usual, indicating that the motor is struggling to maintain torque against the door’s weight.
Intermittent operation, where the motor starts and stops without a clear trigger from the garage door safety sensors, points toward a faulty logic board or a short in the wiring. If you smell a distinct “burnt electronics” odor or see smoke, the unit has likely suffered an internal electrical failure and requires immediate authorized dealer service.
- Grinding or Squealing Sounds: These noises often signify that the drive gear is stripped or the motor bearings have dried out and are seizing. If left unaddressed, this friction will eventually cause the motor to burn out entirely.
- Vibrating Motor Housing: Excessive shaking during operation indicates that the motor is no longer securely mounted or the internal shaft is bent. This vibration can loosen the opener control panel connections over time.
- Reversing Without Obstruction: If the door reverses mid-cycle despite clear photo eyes, the motor’s force-limit settings are likely failing. This is a critical safety issue that demands immediate troubleshooting the garage door opener.
- Delayed Response Time: A lag between pressing the remote and the motor engaging suggests that the remote control reprogramming or the logic board is failing. This delay is often the first sign of a dying capacitor.
- Excessive Heat Generation: If the motor casing feels hot to the touch after only one or two cycles, the unit is working too hard. This is usually caused by drive-train wear and tear or an unbalanced door.
- Smoke or Burning Smell: This is an emergency sign that the motor windings or the circuit board have short-circuited. You must disconnect the power immediately to prevent a fire hazard.
How to Diagnose Garage Door Opener Motor Problems
The diagnostic process must begin with a physical isolation of the motor from the rest of the garage door system. First, pull the emergency release cord to disconnect the door from the opener and attempt to lift the door manually. If the door is heavy or difficult to move, your problem is likely a tension spring replacement issue rather than a motor failure.
Once the door is confirmed to be balanced, reconnect the opener and observe the motor’s behavior while it is under no load. Listen for the sound of the motor spinning; if you hear the motor but the sprocket doesn’t turn, the internal plastic gears are stripped. Use a multimeter to check for power at the opener control panel to ensure a blown circuit breaker or fuse isn’t the root cause.
Cost Breakdown of Garage Door Opener Motor Repair
Repairing a garage door motor is often a balance between the cost of individual components and the labor required for specialized authorized dealer service. Small fixes, such as replacing a capacitor or realigning garage door safety sensors, are relatively inexpensive and can extend the life of an aging unit. However, if the logic board or the motor windings themselves are fried, the cost of parts can quickly approach the price of a brand-new system.
You must also factor in the “opportunity cost” of repairing an old unit that lacks modern security features like rolling codes or smart-home integration. A detailed cost analysis helps homeowners decide whether to invest in a garage door motor repair or opt for a full replacement.
Professional Repair & Replacement Cost Estimates
| Component / Service | Average Part Cost | Labor Estimate | Total Estimated Cost | Primary Reason for Repair |
| Logic Board Replacement | $80 – $150 | $75 – $125 | $155 – $275 | Lightning strike or electrical surge |
| Gear and Sprocket Kit | $25 – $50 | $100 – $150 | $125 – $200 | Stripped gears from wear and tear |
| Capacitor Replacement | $15 – $30 | $75 – $100 | $90 – $130 | Motor hums but won’t start spinning |
| Safety Sensor Fix | $40 – $70 | $50 – $100 | $90 – $170 | Faulty infrared light signal |
| Drive Belt/Chain Repair | $50 – $100 | $100 – $150 | $150 – $250 | Snapped or sagging drive-train |
| Wall Station Replacement | $30 – $60 | $50 – $75 | $80 – $135 | Faulty wall station locking feature |
| Full Motor Assembly | $200 – $450 | $150 – $250 | $350 – $700 | Complete motor or winding failure |
| Spring Balancing | $100 – $200 | $100 – $150 | $200 – $350 | Essential for motor longevity |
| Remote/Keypad Sync | $30 – $80 | $50 – $75 | $80 – $155 | Loss of remote control reprogramming |
Types of Garage Door Opener Motors and Their Issues
The efficiency of your automated entry system depends heavily on the specific motor architecture used to drive the lifting mechanism. Most residential properties utilize either Alternating Current (AC) or Direct Current (DC) motors, each presenting a unique set of maintenance challenges and failure points. While AC motors are known for their rugged simplicity and long-term durability, they often suffer from louder operation and lack the soft start/stop features found in modern units.
DC motors provide much quieter performance and integrated battery backup capabilities, but their complex electronic logic boards are more susceptible to damage from power surges. Understanding these distinctions is critical for effective garage door motor repair, as the diagnostic steps for a hum in an AC motor differ significantly from the digital error codes of a DC system.
Chain-Drive Motor Limitations
Chain-drive motors are the most common and affordable option, utilizing a metal chain to pull the trolley along a reinforced rail. Over time, these systems suffer from significant drive-train wear and tear, leading to chain slack that can cause the motor to jerk or stall.
Regular lubrication is required to prevent the metal-on-metal friction from overheating the motor’s internal thermal protector. If the chain begins to skip, it puts uneven torque on the drive sprocket, which can eventually shear the motor shaft.
Belt-Drive Motor Maintenance
Belt-drive motors replace the noisy metal chain with a rubber-reinforced belt, offering the quietest operation for homes with living spaces above the garage. While the motor itself is usually high-quality, the belt can stretch or crack in extreme temperature fluctuations, causing the door to lose its travel limits.
To fix the garage door motor issues in these units, you must ensure the belt tension is precise—neither too tight nor too loose. Failure to maintain this balance can lead to premature motor bearing failure due to excessive lateral pressure.
Screw-Drive Motor Mechanics
Screw-drive systems use a threaded steel rod to move the trolley, featuring fewer moving parts than chain or belt alternatives. However, these motors are highly sensitive to temperature and require specialized lithium grease to keep the threads from binding during the winter.
When the grease hardens, the motor may experience motor overheating as it struggles to spin the heavy rod through the solidified lubricant. Homeowners often mistake this friction for a dead motor when a simple cleaning and re-greasing would restore full functionality.
Direct-Drive and Jackshaft Issues
Direct-drive and wall-mounted jackshaft motors are the most advanced options, eliminating the rail by mounting directly to the torsion bar. These units are extremely reliable but rely heavily on a perfectly balanced door; if a tension spring replacement is overdue, the motor will burn out rapidly.
Because these units are compact, any internal component failure usually requires an authorized dealer service visit rather than a DIY fix. Their complex internal sensors also require precise garage door alignment to prevent the system from locking out for safety reasons.
Safety Tips During Garage Door Motor Repair
Performing repairs on a motorized opener involves significant electrical and mechanical risks that must be managed with extreme caution. The first and most critical rule is to disconnect the power source to prevent accidental activation while your hands are near the drive gears. You must also ensure the door is fully closed or securely propped up, as the emergency release cord will cause a heavy door to crash down if the springs are weak.
Never attempt to adjust the motor settings while standing on an unstable ladder, as the sudden movement of the rail can cause a fall. Following a strict safety protocol ensures that a simple maintenance task doesn’t result in a trip to the emergency room.
- Disconnect Power Sources: Always unplug the motor from the ceiling outlet or flip the dedicated circuit breaker before opening the chassis. This prevents high-voltage shocks and keeps the opener control panel from being fried during handling.
- Secure the Door Weight: Use C-clamps on the tracks to lock the door in place before pulling the release cord or working on the drive-train. A falling garage door carries enough force to cause fatal injuries or severe property damage.
- Avoid High-Tension Areas: Stay clear of the brackets and cables while you fix the garage door motor, as these are under extreme mechanical pressure. One wrong move near a loaded spring can cause a snapping cable to whip through the air with lethal velocity.
- Use Proper Eye Protection: Wear safety goggles to protect your eyes from flying debris, snapped springs, or leaking lubricants during the repair. Small metal shavings from drive-train wear and tear are a common hazard when inspecting internal gears.
- Test Safety Reversal Systems: Once the repair is complete, always perform a “block test” to ensure the garage door safety sensors are functioning. The motor must instantly reverse when the infrared light signal is interrupted to prevent crushing accidents.
Conclusion
Managing a garage door motor requires a proactive balance between mechanical oversight and technical precision to ensure long-term operational reliability. While many homeowners view garage door motor repair as a reactive task, the most successful maintenance strategies prioritize early diagnostic checks and the immediate replacement of worn drive-train components. By addressing minor issues like photo eyes misalignment or remote control reprogramming lag before they escalate, you safeguard the system against catastrophic electrical failure. Ultimately, a well-maintained opener is the cornerstone of home security, providing a seamless and safe transition between your living space and the outside world.
Investing in high-quality parts and professional authorized dealer service is the most effective way to mitigate the high costs associated with total motor burnout. Whether you are dealing with motor overheating or the complexities of a tension spring replacement, technical accuracy and safety must remain your primary focus during every repair session. Choosing the right motor—whether a rugged AC chain drive or a silent DC belt system—ensures that your hardware is perfectly matched to the architectural demands of your garage door. Adhering to these professional standards guarantees that your automated entry system remains a durable, high-performance asset for years to come.
FAQS
What are common garage door opener issues?
Most operational failures stem from misaligned garage door safety sensors that break the infrared light signal or stripped internal gears caused by long-term drive-train wear and tear. Additionally, a circuit breaker blown fuse or an accidentally engaged wall station locking feature often mimics a dead motor, requiring simple electrical troubleshooting rather than a full replacement.
What’s the average cost to repair a garage door opener?
The typical price for a professional authorized dealer service repair ranges from $100 to $300 depending on whether you are replacing a capacitor or a logic board. Minor fixes like photo eyes cleaning or remote control reprogramming are much cheaper, while complex internal gear rebuilds fall on the higher end of the spectrum.
What’s the average lifespan of a garage door motor?
A high-quality motor from brands like Raynor Garage Doors generally lasts between 10 to 15 years with consistent maintenance and proper door balancing. However, if a tension spring replacement is neglected, the increased weight will cause motor overheating and significantly shorten the unit’s operational life.
How to tell if a garage door opener motor is bad?
A failing motor is characterized by loud grinding noises, visible smoke, or a unit that hums loudly but fails to move the drive-train despite having power. You can confirm a “bad” motor by pulling the emergency release cord to check the door’s balance; if the door moves easily by hand but the motor still struggles, the internal windings or gears are likely shot.
How much does it cost to put a new motor on a garage door?
Installing a brand-new motor assembly usually costs between $350 and $700, which includes the price of the power head and professional labor for the opener control panel setup. While the initial investment is higher than a repair, a new unit provides updated security features and a fresh warranty that protects against future mechanical failure.
