
The modern automatic garage door system relies entirely on a precise, invisible infrared beam to prevent catastrophic property damage or physical injury. When this safety reverse system fails, it is rarely a total motor collapse and almost always a localized communication error between the two photo-eye sensors. Ignoring a garage door sensor light blinking is not just an inconvenience; it is a fundamental breach of home safety that leaves your garage door maintenance incomplete.
To effectively fix the garage door sensor, you must move beyond guesswork and understand the mechanical relationship between the mounting brackets and the logic board. A systematic sensor wiring inspection often reveals that vibrations from the garage door tracks have frayed the low-voltage lines over time. Professionals prioritize garage door sensor alignment because even a millimeter of deviation can trigger a false obstruction signal. Mastering these garage door sensor issues ensures your system remains reliable without requiring a costly garage door professional technician.
What Are Garage Door Sensors?
Garage door sensors act as the primary electronic “eyes” of your opener, specifically designed to halt downward motion if an object enters the door’s path. These units are mounted near the floor on the garage door tracks, emitting a continuous signal that must be received by the opposite unit to complete the circuit. If this invisible infrared beam is broken by a person, pet, or even heavy dust, the motor is signaled to reverse immediately for safety.
Over time, environmental factors or physical bumps can disrupt this connection, necessitating a dedicated garage door safety test. Understanding the hardware is the first step toward a successful garage door opener reset or repair. Without functional sensors, your high-tech opener is effectively a blind, heavyweight that poses a risk to everything beneath it.
Types of Garage Door Sensors
While most residential systems utilize standard photo-eyes, the industry relies on a few variations to ensure the safety reverse system remains foolproof. Most modern units are “fail-safe,” meaning if the sensor loses power or a wire is cut, the door defaults to an open position to prevent accidents.
You will typically find through-beam sensors, which require perfect garage door sensor alignment between a transmitter and a receiver. Some older or specialized commercial systems might use retro-reflective sensors, though these are more susceptible to sunlight interference than standard dual-unit setups.
Standard Through-Beam Sensors
These are the most common units found in any residential automatic garage door system across the country. They consist of a dedicated sender and a receiver that must maintain a direct line of sight to operate.
If the mounting brackets become loose, the beam will fail to hit the lens, causing the door to reverse. Regular sensor lens cleaning is mandatory for these units because they are highly sensitive to debris buildup.
Retro-Reflective Sensor Systems
In a retro-reflective setup, the infrared beam is sent from one side, hits a reflector on the other, and returns to the source. While easier to wire because electronics are only on one side, they are notoriously difficult to align perfectly.
These systems are often prone to errors if the reflector gets scratched or shifted during routine garage door maintenance. A garage door professional technician often recommends upgrading these to through-beam models for better long-term reliability.
Wireless Safety Sensors
Newer tech-forward openers are beginning to integrate wireless sensors to eliminate the need for a complex sensor wiring inspection. These units rely on battery power and encrypted signals to communicate with the garage door opener reset logic board.
While they remove the clutter of wires along the garage door tracks, they introduce the need for regular battery replacements. Failure to monitor battery levels will lead to “phantom” garage door sensor issues that confuse homeowners.
Pressure-Sensitive Bottom Edges
While not technically “photo-eyes,” these sensors are often integrated into the safety reverse system as a secondary backup. They consist of a rubber seal that sends an electrical pulse if it physically contacts an object during closing.
This provides an extra layer of protection if the invisible infrared beam is somehow bypassed or fails. Combining these with photo-eyes creates the most robust safety profile possible for high-traffic residential garages.
Common Signs of Garage Door Sensor Issues
Identifying a failure early prevents the motor from straining against a perceived obstruction, which could lead to a full garage door opener reset or board failure. The most obvious indicator is a door that starts to close but immediately returns to the fully open position without physical contact. You may also notice the overhead motor light flashing ten times, which is the industry-standard code for a safety reverse system error.
If you observe the garage door sensor light blinking on one unit while the other is solid, you are dealing with a clear misalignment or a blocked lens. Do not ignore these signs, as a malfunctioning sensor bypasses the most critical safety feature of your home.
- Intermittent Operation: The door closes sometimes but fails during the brightest part of the day due to sunlight interference. This usually requires adjusting the sensor’s shade or position to prevent “blinding” the receiver.
- Status Light Death: If one or both sensor lights are completely dark, your sensor wiring inspection should focus on the power source. This often points to a disconnected wire at the motor head or a severed line along the garage door tracks.
- Ghost Obstructions: The door reverses even when the path is completely clear of objects or debris. This is a classic sign that garage door sensor alignment is on the “edge” of connectivity and needs tightening.
- Rapid Blinking: A fast, rhythmic flash usually indicates a short in the wire or a hardware failure within the sensor itself. In this case, garage door maintenance usually involves replacing the pair rather than attempting a manual fix.
- Failure to Start: In some units, the door won’t move downward at all if the sensor doesn’t detect a clear path initially. This is the automatic garage door system protecting the motor from working against a permanent blockage.
- Manual Override Needed: You can only close the door by holding down the wall button constantly until it reaches the floor. This is a “deadman” feature designed to let you close the door safely when the photo-eye sensors are broken.
Basic Garage Door Sensor Troubleshooting Steps
The first step in any garage door maintenance routine is a thorough sensor lens cleaning to ensure no physical debris is “breaking” the beam. Even a single spiderweb or a layer of fine dust can cause enough diffraction to trigger a failure in the invisible infrared beam. Once the lenses are clear, verify the physical integrity of the mounting brackets; if they are bent or loose, the vibration of the door moving will cause intermittent errors.
If the lights remain off or blinking, perform a sensor wiring inspection to check for staples that have pierced the insulation or wires that have pulled loose. Finally, if the hardware seems fine, a garage door opener reset may be necessary to clear the logic board’s memory of the fault.
Correcting Sensor Alignment
To achieve perfect garage door sensor alignment, loosen the wing nut on the receiving sensor’s bracket slightly. Pivot the sensor until the LED glows steadily without flickering, then tighten the nut while maintaining that exact position. If the light flickers when you let go, the garage door tracks may be vibrating too much, requiring you to stabilize the bracket further.
Managing Sunlight Interference
If your garage door sensor issues only occur during specific hours, sunlight interference is likely overwhelming the infrared receiver. You can troubleshoot this by swapping the sending and receiving sensors to the opposite sides of the door. Alternatively, fashioning a small shroud or “sun hood” out of dark tubing can protect the lens from being blinded by UV rays.
Testing the Safety Reverse System
Once the sensors appear functional, you must verify the safety reverse system with a physical test. Place a 1.5-inch object on the ground and close the door; it must reverse the moment it makes contact. If the door continues to push against the object, your sensors are either bypassed, or the force settings on the motor need an urgent adjustment by a garage door professional technician.
Understanding Sensor Light Codes & What They Mean
Every major manufacturer uses specific light patterns to communicate why the automatic garage door system has stopped functioning. Typically, a solid light on both sensors confirms that the invisible infrared beam is connected and the circuit is closed. A blinking green light usually points to a misalignment, while a blinking red or amber light suggests the sensor is receiving power but cannot “see” its partner.
If the lights are completely off, your sensor wiring inspection is the priority, as the units aren’t receiving the necessary low-voltage current from the opener. By learning these codes, you can determine if you need a simple adjustment or if the hardware has reached the end of its lifespan. Always refer to your specific model’s manual before attempting a garage door opener reset, as some codes can indicate deeper logic board failures that mimic sensor issues.
Advanced Garage Door Sensor Fixes
When basic alignment fails, the problem usually lies within the integrity of the signal path or the power supply from the motor head. Advanced troubleshooting requires you to bypass the existing house wiring to determine if the fault is in the “wall” or the “unit.” You should check the voltage at the sensor terminals using a multimeter; a reading below 4-6 volts usually indicates a transformer issue or a short circuit.
If the voltage is correct but the invisible infrared beam still fails, the problem is likely internal component degradation within the receiver. Only after verifying the electrical flow should you consider a full garage door opener reset to recalibrate the sensitivity.
Bypassing House Wiring for Testing
To isolate a wiring fault, remove the sensors from their mounting brackets and bring them up to the motor unit. Connect them directly to the motor terminals using two short lengths of fresh bell wire to see if the status lights stabilize.
If the sensors work perfectly at the motor but fail at the floor, your pre-installed wiring is compromised and must be replaced. This “short-wire test” is the fastest way to stop wasting time on healthy sensors when the problem is a hidden staple through a wire.
Resolving Logic Board Signal Errors
Sometimes the sensors are fine, but the logic board on the automatic garage door system has suffered a power surge. This can cause the board to stop “listening” to the safety reverse signal, even if the sensor lights are solid green.
A professional-grade garage door opener reset involves unplugging the unit and discharging the capacitors to force the board to reboot its safety protocols. If the error persists after a hard reboot, the logic board’s sensor circuit may be fried, requiring a board replacement.
Stabilizing Vibrating Track Mounts
High-speed openers or heavy wooden doors create significant vibration that can momentarily break the garage door sensor alignment mid-cycle. If your door stops halfway down, check if the garage door tracks are shaking the sensors out of their path during operation.
Reinforcing the brackets with heavy-duty dampeners or moving them from the tracks to the wall can solve these “phantom” obstructions. A stable mounting surface is just as critical as the infrared beam itself for consistent performance.
Preventative Maintenance Tips to Avoid Sensor Issues
Proactive garage door maintenance is the only way to ensure your safety reverse system doesn’t fail when you’re in a rush. Sensors are often the most neglected part of the system because they are small and tucked away near the floor. You should treat them as high-precision optical instruments that require a clean environment to function at peak efficiency.
Regular inspections prevent the small “glitches” that eventually lead to a total system lockout or an expensive emergency repair call. By dedicating five minutes a month to these components, you extend the lifespan of the entire opener.
- Monthly Lens Calibration: Use a soft, dry microfiber cloth to perform sensor lens cleaning to remove salt, dust, or spiderwebs. Even a light film of grime can diffuse the invisible infrared beam, leading to intermittent signal loss.
- Bracket Tightening: Check the bolts on your mounting brackets every quarter to ensure the vibrations from the door haven’t loosened them. Secure brackets prevent the sensors from sagging or shifting during the door’s high-vibration closing cycle.
- Clear the Path: Keep the area around the garage door tracks completely clear of trash cans, gardening tools, or debris. Physical clutter is the number one cause of “accidental” sensor misalignment and unnecessary service calls.
- Pest Control: Spiders and insects are attracted to the warmth of the sensor LEDs and often build nests inside the housing. Periodically spray a mild insect repellent around (not on) the sensors to keep the optical path clear of biological obstructions.
- Wire Protection: Ensure the low-voltage wires are tucked neatly behind the tracks and are not hanging loosely. Loose wires are easily snagged by moving parts or pets, leading to a mandatory sensor wiring inspection and repair.
Garage Door Opener Sensor Repair Kit
When a garage door professional technician isn’t immediately available, a dedicated repair kit is your best investment for a permanent fix. These kits typically include a pair of replacement photo-eyes, new mounting brackets, and weather-resistant wire connectors. It is vital to match the kit to your specific brand (e.g., Chamberlain, LiftMaster, or Genie) because the voltage requirements and signal frequencies are not always universal.
Replacing the entire sensor assembly is often more cost-effective than trying to patch old, corroded wiring. Refer to the table below to understand exactly what you need for a successful restoration of your safety system.
| Component | Function | Technical Specification | Importance |
| Replacement Photo-Eyes | Emits and receives the invisible infrared beam. | Standard 2-wire connection; typically 4-6V DC. | Critical – Replaces degraded or blinded internal lenses. |
| Heavy-Duty Brackets | Secures the sensors to the garage door tracks. | Galvanized steel or reinforced plastic; vibration-resistant. | High – Maintains long-term garage door sensor alignment. |
| UV-Rated Wiring | Connects sensors to the automatic garage door system. | 20-22 Gauge bell wire; moisture-resistant insulation. | Medium – Prevents future shorts from sunlight interference. |
| Crimp Connectors | Joins new sensor wires to existing motor lines. | Gel-filled moisture-proof connectors (B-wire style). | High – Ensures a corrosion-free electrical path. |
| Alignment Tool | Assists in perfecting the line of sight. | Integrated LED or laser pointer guide. | Optional – Simplifies the setup for DIY homeowners. |
| Sunlight Shields | Prevents “blinding” the receiving sensor. | Black opaque plastic hoods or shrouds. | Contextual – Essential if the door faces East or West. |
The easiest way to line up garage door sensors
If you are still struggling with garage door sensor alignment, you are likely overcomplicating a simple geometric problem. Precision is the only thing that matters; a “near miss” with an invisible infrared beam is still a failure in the eyes of the logic board. Most homeowners waste hours nudging brackets back and forth when they should be using a systematic approach to lock in the signal.
Stop guessing where the beam is hitting and start using the physical structure of the garage door tracks as your guide. Once you achieve a solid status light, you must tighten the mounting brackets aggressively to ensure that the next vibration doesn’t reset your progress to zero.
Using a String Line for Perfect Geometry
The most reliable DIY method for garage door sensor alignment is the string line technique. Tie a piece of string to the center of the sending sensor and stretch it tightly across the opening to the center of the receiving unit.
If the string doesn’t clear the garage door tracks or if it sits at an angle, your brackets are physically out of alignment. Adjust the height until the string is perfectly level, ensuring the invisible infrared beam has a straight, unobstructed path to travel.
The Laser Level Shortcut
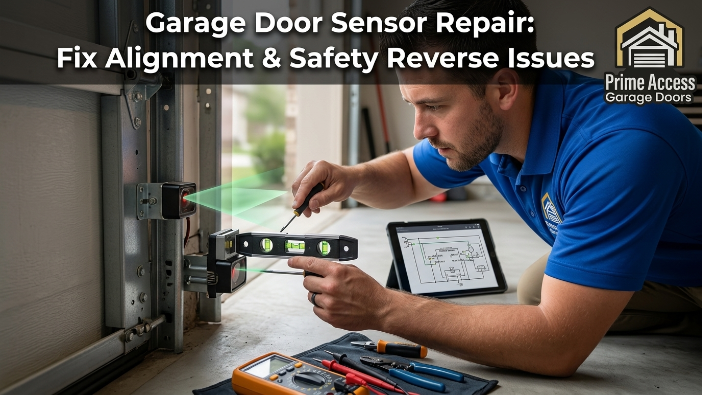
For those who want absolute certainty without the hassle, a small pocket laser level is the ultimate tool to fix the garage door sensor. Hold the laser flat against the lens of the sending sensor and aim it toward the receiving lens across the garage.
If the laser point doesn’t hit the center of the opposite lens, you have found your “ghost” obstruction. This method removes the guesswork and is the same technique used by a garage door professional technician to guarantee a first-time fix.
Garage door sensor wire repair
A professional sensor wiring inspection often reveals that the “malfunction” is actually a physical break in the copper line, not a failed sensor. To perform a lasting repair, you must strip the wires back to clean, unoxidized copper and use moisture-resistant crimp connectors rather than simple electrical tape. The tape will eventually dry out and peel, leading to intermittent garage door sensor issues as humidity changes.
If you find multiple staples piercing the insulation along the garage door tracks, it is more efficient to pull a completely new run of 22-gauge bell wire. Ensure the wire is pulled taut and secured with insulated staples that do not pinch the jacket, as a “pinched” wire is the leading cause of internal shorts. After completing the splice, always perform a garage door opener reset to ensure the system recognizes the restored electrical current. Consistency in your wiring is the only way to maintain the integrity of the safety reverse system over the long term.
Conclusion
Maintaining a functional automatic garage door system requires consistent oversight of the delicate electronic and mechanical components that ensure home safety. By systematically addressing garage door sensor issues through precise garage door sensor alignment and regular sensor lens cleaning, you prevent the wear and tear that leads to premature motor failure. A commitment to these small technical adjustments ensures that your safety reverse system remains a reliable barrier against accidents, providing long-term peace of mind for any homeowner.
Ultimately, the longevity of your hardware depends on the quality of your garage door maintenance and the integrity of your electrical connections. Whether you are performing a complex sensor wiring inspection or a simple garage door opener reset, prioritizing accuracy over quick fixes is what differentiates a secure home from a hazardous one. If DIY troubleshooting fails to restore the invisible infrared beam, do not hesitate to contact a garage door professional technician to recalibrate the system to factory safety standards.
FAQS
Can you fix a garage door sensor?
Yes, most garage door sensor issues can be resolved by homeowners through simple sensor lens cleaning or realigning the mounting brackets. However, if the internal circuitry is fried or the invisible infrared beam transmitter has failed, you will likely need to install a garage door opener sensor repair kit.
How much does it cost to fix a sensor on a garage door?
A DIY fix typically costs between $20 and $50 for a replacement kit, which is far more economical than a service call. If you hire a garage door professional technician, expect to pay between $100 and $200 for labor and diagnostic testing of the automatic garage door system.
What are common garage door sensor problems?
The most frequent culprits are garage door sensor alignment shifts caused by vibration and sunlight interference, blinding the receiving lens. Additionally, a failed sensor wiring inspection often reveals frayed lines along the garage door tracks that break the electrical circuit.
How do you know if a sensor is bad on a garage door opener?
You can confirm a sensor is bad if the status lights remain dark despite a confirmed power supply or if the garage door sensor light blinking persists after cleaning. If the door only closes when you hold the wall button, the safety reverse system is definitely failing to receive a valid signal.
Why do garage door sensors need alignment?
The system requires a perfectly straight line of sight to maintain the invisible infrared beam that tells the motor the path is clear. If the mounting brackets shift even slightly, the connection is severed, triggering the safety reverse system to prevent the door from closing.
